Showing posts with label Accessories. Show all posts

Monday, 4 February 2013

Granny Square Crochet Headband

Ok if you have seen my posts before you might guess I like a crochet granny square (here, and here) so when deciding what to make to start my crafting going again I of course had to turn to my trusty old friend, the granny square!

I wanted to make something useful and as this pregnancy seems to have made my hair CRAZY I decided on a hairband to mainly use when washing my face to keep my hair from getting wet and even more frizzy than it already is!


Sunday, 23 October 2011

Knitted bag for OH's gran

On Monday, my darling Oh announced it was his Gran's birthday on Friday. Well we had of course not bought her a present, had no idea what we could nip out and get so I decided to knit her a bag! She is always admiring the one I made myself (here) , I had black wool in my stash so I made her this


Monday, 30 May 2011

25p Shawl

A few months ago my Gran sent me some wool she bought in a charity shop for 5p per ball! I didnt particularly like the wool so its just been stored, UNTIL NOW! Due to summer disappearing (in fact its more like winter,we've had to put the central heating on - in May!) I decided to make myself a shawl just to put over my shoulders while reading, knitting etc. As I'm not planning on wearing it outside the house then I dont really care what it looks like so the 5p wool was perfect!
I decided on the Textured shawl recipe I found on Ravelry -  clicky this is what I ended up with

Now its finished, I actually really like it! It was so quick to knit, I just picked it up in the evenings, doing a few rows at a time and it only took two weeks. If you were to knit it in one go it would take a few days max. Most importantly, it only cost 25p!! BARGAIN!! I will now be scouring charity shops for more woolly bargains!

Tuesday, 24 May 2011

Simple hairclips


I've recently decided, after years of tying it back everyday, I love my hair! (well the ghds help alot) and I've been on the lookout for some cute hairclips to prevent the whole hair stuck in lipgloss look (seriously, why does no-one else seem to get it? I step out the door and WOOSH hair stuck on my face)

Tuesday, 8 March 2011

Woolly Earrings!

In my quest for a decluttered house I found these plain black hoop earrings which have seen better days. Now I'm guessing I must have bought these quite a few years ago when I was going through my 'goth' phase but these really are not my style anymore, so I turn them into... THESE!

Much better! I just wrapped wool around the earrings dabbing a bit of glue on every so often to make sure the wool didnt slip and added a bead! You have probably noticed the little bit of black at the top I left unwrapped, this was because the wool was really tickling my ear!  That is the back of the earring so when its on, you cant see it!

Tuesday, 22 February 2011

New Shoes!!


Ok so technically they're not new shoes but I love them anyway! I've been trying to declutter and while sorting my wardrobe, I found these two pairs of 'emergency' shoes (bought when I was wearing heels in work and my feet were about to fall off!) that I never wear anymore. Of course I had to modify them slightly because I hate plain shoes!

So this is what I started with:


One pair boring plain shoes (£4 in Primark)

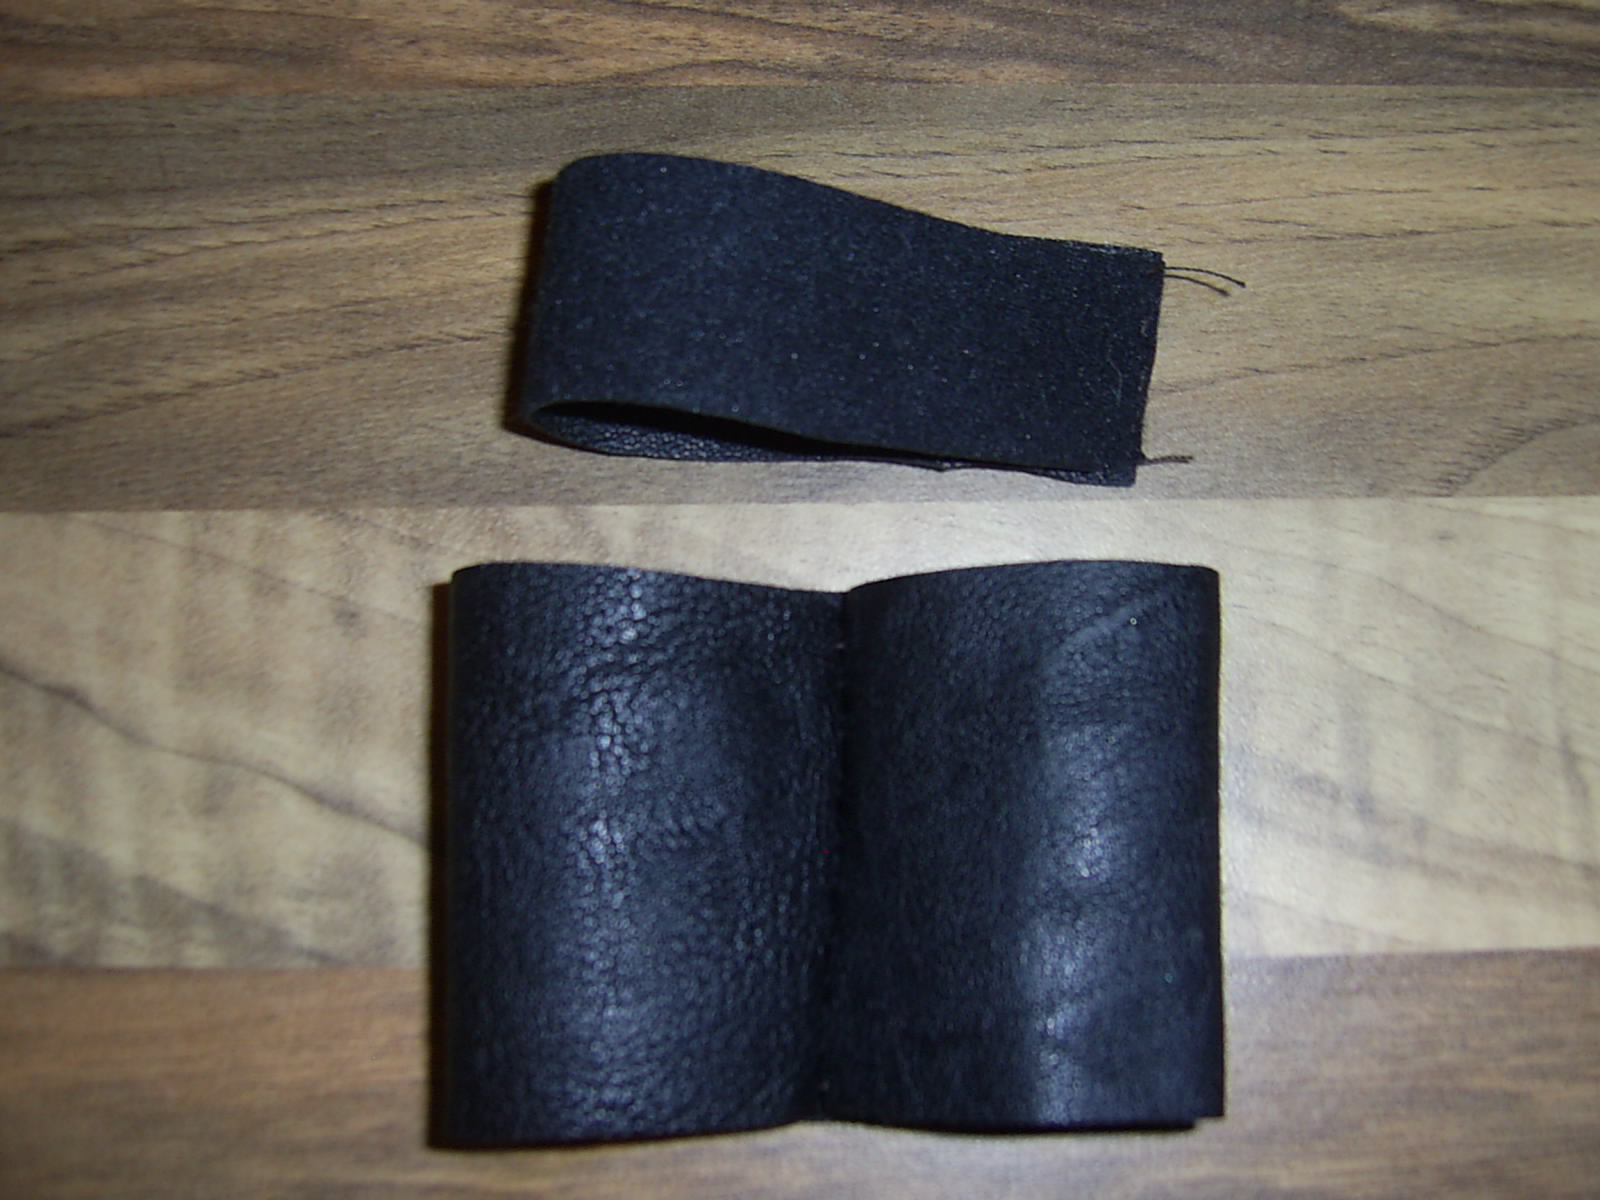
1 Strip Material 6.75 inch x 2 inch

1 Strip Material 5.25 inch x 1 inch

Small scrap material (not pictured)


The material I used for the bow was actually part of an old handbag (yes my decluttering is going well!) Because they are shoes, you really want something thats quite sturdy and weather proof and also wont fray! Mine was some kind of fake leather.


1. Starting with the smaller strip of material sew edges together to make a cuff (sew right sides together so it will lay flat on the shoe) Turn it the right way round with the seam in the middle. Repeat for the larger strip


2. Take the smaller cuff and with the seam facing down, pinch the middle together to make a rough bow shape. Put a few stitches through to hold it in place, its easier if you wrap the thread around the middle just to keep it tight.


3. Place the larger cuff seam down on your work surface and position the smaller bow on top in the centre
4. You might need a pair of pliers on the next section just to get the needle through. Pinch the larger cuff together as you did for the first bow, holding the smaller bow in place as you do. Its hard to describe, this picture probably shows it better. Sew through the middle quite a few times, pulling it quite tight.
5. Well I completely forgot to take a picture of the next step but its pretty self explanatory. Cut a thin stip of material and sew it right around the middle of your bow, just to hide the stitches. Attach to your shoe and you're done!
The black flower shoes used the same material as the bows and I followed this tutorial for the flowers, attaching some fake pearls from a broken necklace I had laying around!


Saturday, 8 January 2011

New Bag!


I'd been looking for a new bag for a while but just couldnt find one I actually liked, then I found a picture of the Pheobe Bag by arsty-crafty babe and fell in love! I printed the pattern off..and thats as far as I got, that was a few months ago.

Inspired by the year of craft and looking in my craft cupboard and spotting an old cushion cover that was just too scratchy to be used as a cushion (I like practical cushions, I'd scratch my face off if I lay on it!) I created this!
Is it possible to be in love with a bag??
Not bad for an old cushion cover and some remnants!


If you are looking for a bag pattern, Artsy-crafty babe has some fab ones, the Pheobe bag is free! Clicky