Showing posts with label Sewing. Show all posts

Sunday, 1 September 2013

Sew Prettty Homestyle baby quilt

So here it is.The quilt that has been on the go for YEARS! I originally started it as a gift for one of my neices, it is now for my own Daughter! Its from the Sew Pretty Homestyle book by Tilda, the embroidery designs are stolen from different projects in there (like this cafetiere)


Oh dear...I really should iron BEFORE I take the pictures! Also I swear its not wonky in real life!

All hand sewn using scraps from my stash so free, its in no way perfect but I am so proud of it! Also very relieved its finished as its been hanging around for years, been through..4 house moves with us (yeah we move alot)


My two favourite sections!


Wednesday, 6 February 2013

My favourite sewing project...so far!

I thought I'd take a break from crochet, knitting and attempting to grow vegetables to show everyone the most useful thing I have ever made, my needle book.


It was one of the first 'proper' things I made. Its hand sewn, wonky and to be honest has seen better days but I just cannot bring myself to make a new one and replace it. The original pattern was from my trusty Sew Pretty Homestyle book by Tilda (one of my favourite pattern books to browse through, dreaming that my house actually looks like the pictures...) but there are many free patterns online if you search for them.


So if you are looking for a quick, useful project that uses hardly any material at all, make a needle book! Trust me it will get used.

Tuesday, 8 November 2011

Christmas presents so far

Now I have no idea how this actually happened, but I've been roped into making quite a few christmas presents for my neices and nephews which will be coming from Santa.
My list so far is:

3 tutus
2 crayon rolls
4 sock monkeys
2 fairy wands

aswell as everything I am meant to be making for presents from me! (I cant list it here incase the recipients see but theres alot sob sob)

So far all I've managed to make is 1 tutu and 1 crayon roll.

I went for the easy option of no sew tutus - this one is for a 3 year old - short and poofy rather than long and floaty

The side looks like its sticking out weirdly but I swear its not! Its just my bad camera skills!
I just did a quick google of no sew tutus - loads of tutorials come up so take your pick! They are so easy, quick and cheap to make (and will look quite large wrapped under the tree of course lol)


I've also made

Sunday, 23 October 2011

Felt christmas tree decorations

I finally got round to carrying on with some child friendly christmas tree decorations. I went for the easy route - felt! no fraying, easy to sew, simple


Wednesday, 8 June 2011

Owl Doorstop


Since moving into this house, we've realised that none of the floors are actually level. Considering it was built in 1771 thats not suprising really but the only problem we've found is the doors open on their own!

Tuesday, 24 May 2011

Simple hairclips


I've recently decided, after years of tying it back everyday, I love my hair! (well the ghds help alot) and I've been on the lookout for some cute hairclips to prevent the whole hair stuck in lipgloss look (seriously, why does no-one else seem to get it? I step out the door and WOOSH hair stuck on my face)

Monday, 23 May 2011

Another knitted dress

Well I PROMISE I'm working on something new at the moment but for now I'll add this dress I made for my second youngest neice. Half knitted, half sewn its SO CUTE! I've asked for an action shot but my sister is not the quickest person in the world lol

I seem to only have a photo of the back! The front is the same but without the buttons anyway. It really is a rubbish photo (moving house ate up my camera fund so I'll have to live with this rubbishy one for a bit longer)
I'll harrass my sister until she takes a new photo lol


The pattern is here (the English translation is below the picture!) if you want to try. I will be making more at some point for my neices because they look so cute on! 


Tuesday, 5 April 2011

Cafetiere cosy

Recently me and my partner have been making coffee every Saturday morning and sitting by the table to drink it. A very nice routine, even if I do say so myself, however the cafetiere was looking a bit boring. Then I remembered one I'd seen in one of my beloved Tilda books, Sew Pretty Homestyle and this was born!

Tuesday, 15 March 2011

Tent like top to summery skirt

Ok, so this was such an easy recon I'm quite embarrased to post it! Last summer I found this top in the sale for £5.

Thursday, 3 March 2011

Rolled flower cushion cover


I know these fabric flowers have been done to death on blogs before, but I have never made one before! So I gathered my scraps (in this case an old skirt and a sheet) and set about making myself a new cushion cover. I really like it and by some coincidence (or I like to pretend it was planned) the colours match my living room curtains perfectly! I wish I had an amazing vintage chair to show this off but all I have is my sofa, until I find a bargain chair to recover that is!

Tuesday, 22 February 2011

New Shoes!!


Ok so technically they're not new shoes but I love them anyway! I've been trying to declutter and while sorting my wardrobe, I found these two pairs of 'emergency' shoes (bought when I was wearing heels in work and my feet were about to fall off!) that I never wear anymore. Of course I had to modify them slightly because I hate plain shoes!

So this is what I started with:


One pair boring plain shoes (£4 in Primark)

1 Strip Material 6.75 inch x 2 inch

1 Strip Material 5.25 inch x 1 inch

Small scrap material (not pictured)


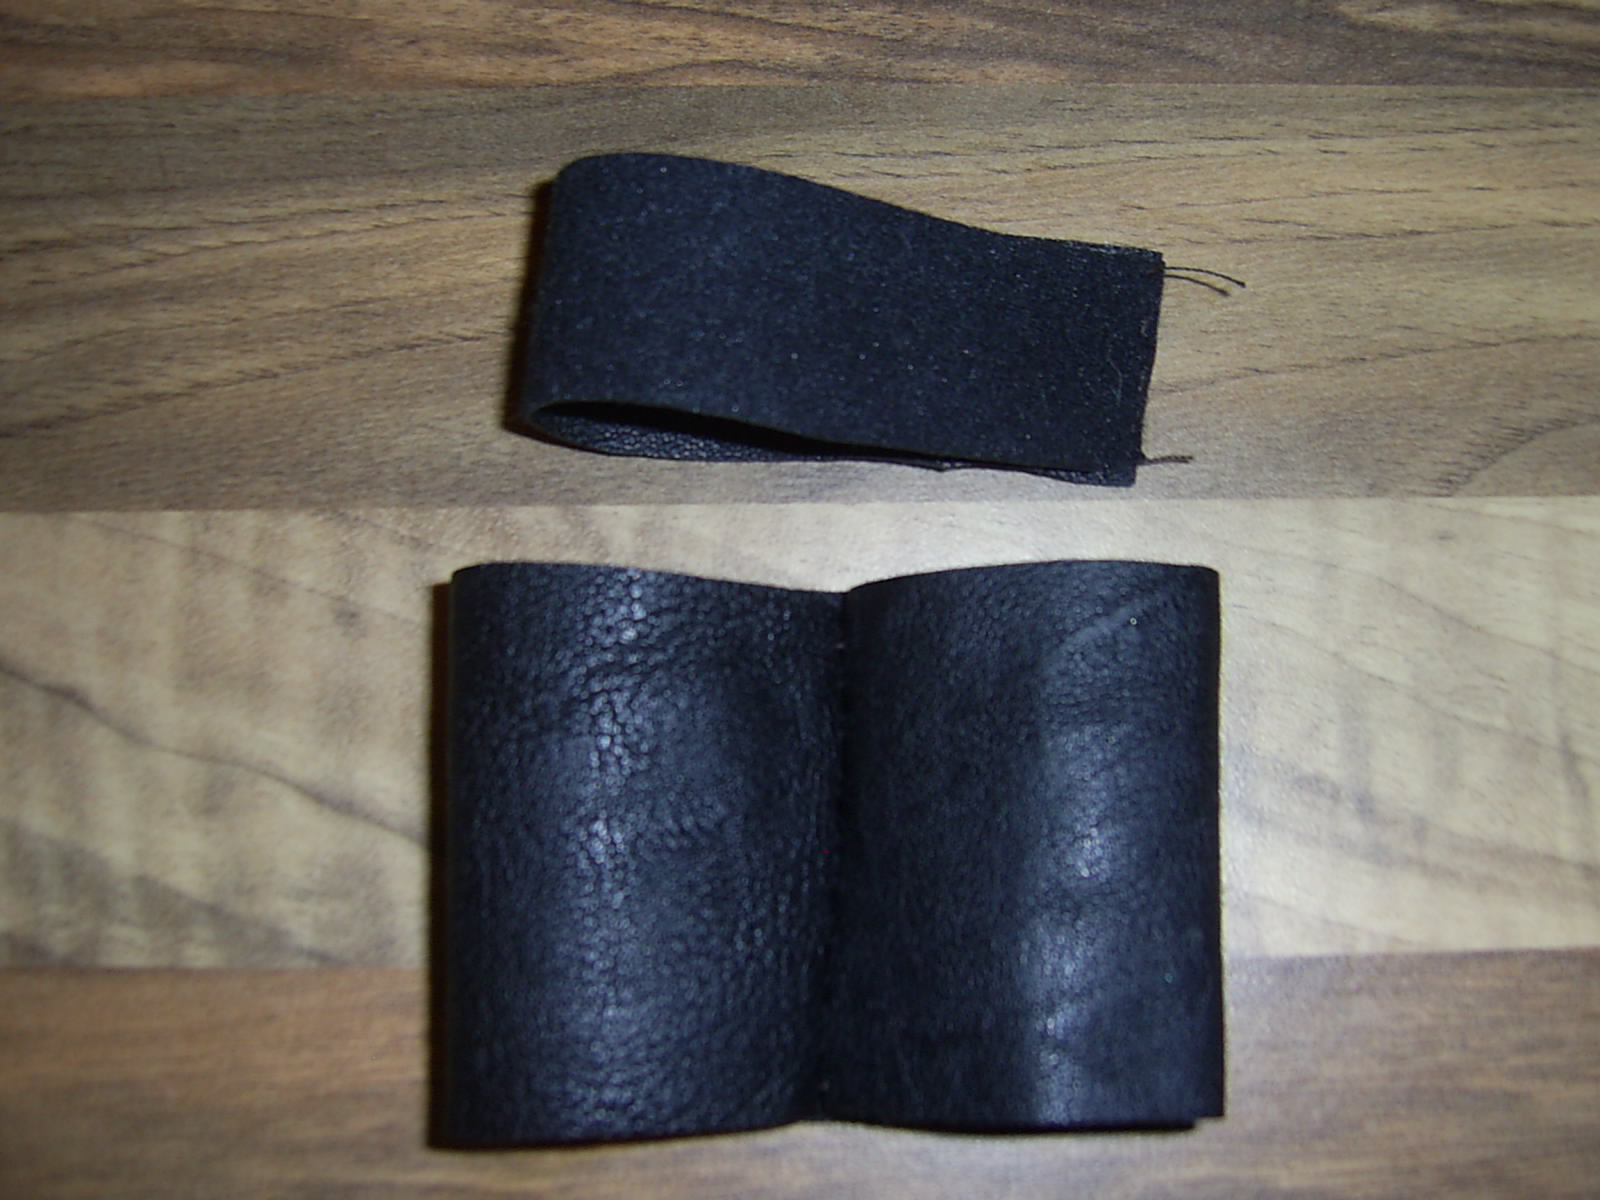
The material I used for the bow was actually part of an old handbag (yes my decluttering is going well!) Because they are shoes, you really want something thats quite sturdy and weather proof and also wont fray! Mine was some kind of fake leather.


1. Starting with the smaller strip of material sew edges together to make a cuff (sew right sides together so it will lay flat on the shoe) Turn it the right way round with the seam in the middle. Repeat for the larger strip


2. Take the smaller cuff and with the seam facing down, pinch the middle together to make a rough bow shape. Put a few stitches through to hold it in place, its easier if you wrap the thread around the middle just to keep it tight.


3. Place the larger cuff seam down on your work surface and position the smaller bow on top in the centre
4. You might need a pair of pliers on the next section just to get the needle through. Pinch the larger cuff together as you did for the first bow, holding the smaller bow in place as you do. Its hard to describe, this picture probably shows it better. Sew through the middle quite a few times, pulling it quite tight.
5. Well I completely forgot to take a picture of the next step but its pretty self explanatory. Cut a thin stip of material and sew it right around the middle of your bow, just to hide the stitches. Attach to your shoe and you're done!
The black flower shoes used the same material as the bows and I followed this tutorial for the flowers, attaching some fake pearls from a broken necklace I had laying around!


Saturday, 8 January 2011

New Bag!


I'd been looking for a new bag for a while but just couldnt find one I actually liked, then I found a picture of the Pheobe Bag by arsty-crafty babe and fell in love! I printed the pattern off..and thats as far as I got, that was a few months ago.

Inspired by the year of craft and looking in my craft cupboard and spotting an old cushion cover that was just too scratchy to be used as a cushion (I like practical cushions, I'd scratch my face off if I lay on it!) I created this!
Is it possible to be in love with a bag??
Not bad for an old cushion cover and some remnants!


If you are looking for a bag pattern, Artsy-crafty babe has some fab ones, the Pheobe bag is free! Clicky